A practical guide presented by NuaSense. We build IoT sensors that read your farm’s conditions and tell you when pests, fungi, and disease risks are rising, so you spray smarter, not more.
For most Kenyan farmers, the sprayer is one of the most important tools on the farm. Used well, pesticides protect maize from fall armyworm, save tomatoes and potatoes from late blight, and keep beans and kale free of aphids. Used carelessly, they waste your hard-earned money, harm your health, damage your soil, and can leave residues that get your produce rejected at the market or the export gate.
The difference between these two outcomes comes down to technique. The same chemical, from the same bottle, can either rescue a crop or fail completely depending on how you choose it, mix it, time it, and apply it. This guide breaks the whole process down step by step, in plain language, so that every shilling you spend on pesticide actually works for you.
It is a long read, but pesticides are not something to rush. Take your time, and treat this as a reference you can come back to each season.
Understanding pesticides before you spray
Before you mix anything into your knapsack, it helps to understand what you are actually using and why. A few minutes of clear thinking here saves you from spraying the wrong product on the wrong problem, one of the most common and expensive mistakes on the farm, and one that quietly costs Kenyan farmers millions of shillings every season.
Types of pesticides: insecticides, fungicides, and herbicides
“Pesticide” is a general word that covers several very different products, each designed for a different enemy. If you do not know which type you need, you cannot possibly choose the right one.
Insecticides kill insects, the pests that chew, suck, and bore into your plants. In Kenya these are among the most damaging problems farmers face: fall armyworm in maize, aphids on kale and beans, thrips and Tuta absoluta (the tomato leaf miner) on tomatoes, stalk borers in cereals, and the diamondback moth on cabbages and other brassicas. They come in different families that work in different ways. Some kill on contact, others must be eaten by the pest, and others move inside the plant (systemic) to protect new growth.
Fungicides control diseases caused by fungi, which show up as spots, rots, moulds, rusts, and wilts. Common Kenyan examples include late blight and early blight on potatoes and tomatoes, coffee leaf rust and coffee berry disease, powdery and downy mildews on vegetables, and various leaf spots. A crucial point to remember is that many fungicides are preventive and must be applied before the disease takes hold, because once a fungal infection is established it is extremely hard to reverse.
Herbicides kill weeds that compete with your crop for water, sunlight, and nutrients. Some are selective (they kill weeds but spare your crop) and some are non-selective (they kill almost any green plant they touch, so they must be used before planting or between rows with great care).
Using the wrong category is simply throwing money away. An insecticide will do nothing against a fungal disease, a fungicide will not stop caterpillars eating your leaves, and a herbicide sprayed carelessly can kill the very crop you are trying to protect. Knowing which group your problem belongs to is the very first step toward an effective spray, and toward not wasting a full tank of expensive chemical.
Correctly identifying the pest, weed, or disease first
You cannot treat what you have not correctly identified. This sounds obvious, yet “spray first, ask questions later” is one of the most expensive habits in Kenyan farming.
Walk your field regularly, at least twice a week, and scout carefully, reading the pattern of damage for what it tells you. Chewed, ragged, or holed leaves usually point to insects such as caterpillars, armyworm, or beetles; look for the pests themselves, and always turn the leaves over, because aphids, whiteflies, mites, and eggs love to hide on the underside. Spots, blotches, rot, mould, or a powdery coating usually point to fungal or bacterial disease, often starting on the lower or older leaves and spreading upward. Yellowing, wilting, or stunted growth is trickier, because it can be caused by pests, disease, drought, waterlogging, or even a simple nutrient shortage, so do not assume it is a pest and reach straight for the insecticide.
If you are not sure, do not guess. Take a clear photo or a fresh sample in a sealed bag to your nearest agrovet, or to your county agricultural extension officer, before buying anything. A correct diagnosis costs you nothing and can save you a whole season’s spraying budget.
This step matters more than most farmers realise, because spraying “just in case” is one of the biggest sources of wasted chemical, faster pest resistance, and unnecessary risk to your health. A study of horticultural farmers in Meru County found that pesticide poisoning and misuse are a real and recognised problem in Kenyan farming communities, driven in large part by people spraying without proper information about what they are actually dealing with (research published in the US National Library of Medicine). Confirming the actual problem before you spray protects your crop, your money, and your family all at once.
How NuaSense helps
Spraying out of fear, “the neighbour’s maize had armyworm, so let me spray mine too”, is one of the riskiest and most costly habits on the farm. Every unnecessary spray burns money, builds up pest resistance, leaves more residue on your food, and exposes you and your soil to chemicals you did not need to use.
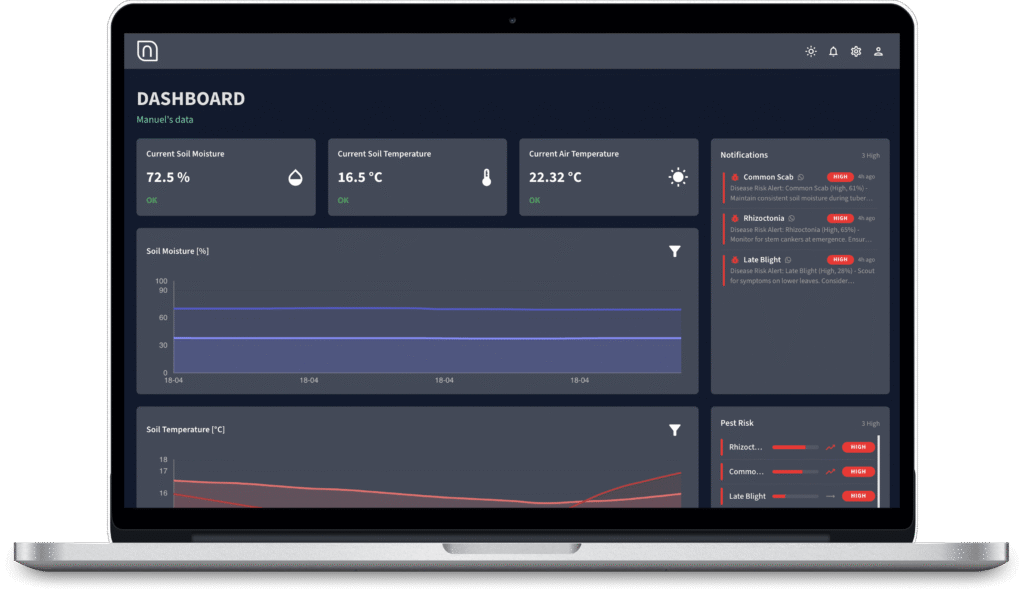
NuaSense sensors continuously track the conditions that pests and fungi need in order to thrive, things like humidity, leaf wetness, and temperature, and alert you when the risk on your farm is genuinely rising. That means you spray when there is a real, building threat, not out of guesswork or because of a rumour from the next shamba. The result is fewer sprays, lower costs, healthier soil, and a safer home.
Choosing the right pesticide for your crop and problem
Once you know exactly what you are fighting, choose a product that is registered, legal, and approved for your specific crop and pest. In Kenya, pesticides are regulated by the Pest Control Products Board (PCPB), which keeps an official register of every approved product. You can search it on the PCPB website. The rule is simple: if a product is not on that register, it should not be on your farm.
This matters more now than ever. In 2025, the government carried out a major review and banned dozens of harmful pesticide products while placing restrictions on hundreds more, bringing Kenya closer to European safety standards. A chemical your neighbour swore by a few seasons ago may now be banned, restricted to certain crops, or prohibited for open-field spraying. Using a banned product not only risks your health and your soil; it can get your entire harvest rejected by buyers, supermarkets, and export markets that test for residues.

A few habits will keep you on the right side of this. Buy only from a licensed agrovet, never from informal hawkers selling loose or repackaged chemical, and always check the expiry date, rejecting anything expired or with a damaged, unreadable label. Confirm that the label lists your crop and your pest by name, because a product approved for coffee may be neither safe nor effective on tomatoes. Be suspicious of “bargains,” because cheap, unbranded, or smuggled products are usually a false saving: they may be counterfeit, diluted, banned, or simply useless. Finally, ask about the product’s mode of action and rotate between different chemical families across the season so pests do not build up resistance to one product.
A correctly chosen, registered product is the foundation everything else rests on. Get this wrong, and even perfect spraying technique cannot save you.
Preparing for safe and effective pesticide application
Good spraying is decided long before you pull the trigger. Preparation is where you protect your own body and make sure the chemical will actually do its job. Rushing this stage is how farmers get poisoned and how full tanks of expensive product end up wasted.
Reading the label: dosage, dilution, and instructions
Treat the label as the legal and technical instruction manual for that exact product, never as decoration to be skipped. It tells you the correct dose, how much water to mix it with, which crops and pests it is approved for, how long to wait before harvest, what protective gear to wear, and how to store and dispose of it safely.
Read it every single time, even for a product you have used for years, because formulations, doses, and legal restrictions change. The instructions are usually given as an amount of product per a certain volume of water, or per acre, so make sure you understand which, because mixing “per knapsack” when the label means “per acre” can leave you with either a useless under-dose or a dangerous over-dose.
Resist the very common temptation to “add a little extra for good measure.” Using more than the recommended dose does not kill pests faster or better. Instead it wastes expensive chemical you cannot get back, leaves higher residues on your food that put your family’s health and your market access at risk, speeds up pest resistance so the product stops working in future seasons, and increases harm to your soil, your pollinators, and the beneficial insects that naturally control pests. The right dose, correctly measured, is almost always the most effective dose. Spraying more simply costs you more money and puts you in more danger.
Wearing the right protective equipment (PPE) when applying pesticides
Pesticides can enter your body through four routes: the skin, the eyes, the mouth, and the lungs. Protect all four, every time, even for “just a quick spray.” Many farmers skip protective gear because it is hot and uncomfortable, but the long-term cost of repeated exposure (headaches, nausea, skin problems, and far more serious chronic illness) far outweighs a little discomfort.
At a minimum, you should wear:
- Overalls or long-sleeved clothing that fully covers your arms and legs
- Rubber or nitrile gloves, never cloth or leather, which soak up chemical and hold it against your skin
- Gumboots, with your trouser legs over the boots so spray runs off rather than into them
- A face mask or respirator suitable for spraying, to protect your lungs from droplets and fumes
- Goggles or a face shield to keep spray out of your eyes
- A wide-brimmed hat or hood to protect your head and neck
While spraying, never eat, drink, or smoke, and never use your mouth to blow out a blocked nozzle, which is a shockingly common way farmers swallow concentrated chemical. As soon as you finish, wash your hands, face, and any exposed skin thoroughly with soap, and change out of your work clothes before going home and touching your children, food, or bedding. Always wash spraying clothes separately from the family’s normal laundry.
Mixing and measuring pesticides safely and accurately
Mixing is one of the most dangerous moments because you are handling chemical in its strongest, most concentrated form. Do it in a well-ventilated, open area on level ground, well away from children, animals, food stores, and water sources such as wells, rivers, dams, and water tanks.
Always put your full protective gear on before opening the container, never after. Use a dedicated measuring cup or scale kept only for pesticides, never a kitchen cup, a soda bottle, your hands, or “a capful by eye.” Half-fill your sprayer with clean water first, then add the measured chemical to the water rather than water to the concentrate, to avoid splashing strong product onto yourself, and top up with the rest of the water before stirring gently so the mixture is even. An uneven mix means some plants get too much and some too little. Finally, triple-rinse the empty container and your measuring tools into the sprayer, so no product is wasted and the container is safer to dispose of.
Only ever mix the amount you will actually use that same day. Leftover diluted spray cannot be stored safely and becomes a disposal headache, so work out how much your field needs before you start: know the size of the plot you are treating, know roughly how much area one full knapsack covers for you, and measure your chemical and water accordingly. Calculating first means no dangerous leftovers and no half-treated field.
Applying pesticides the right way
This is the moment everything has been building toward. The same chemical, at the same dose, can either work beautifully or fail completely depending on how and when you apply it. Master this section and you will get far more value from every bottle you buy.
Timing it right: weather, time of day, and crop stage
Weather is one of the single biggest factors in whether your spray succeeds, and it is the factor farmers most often ignore.
The general guidance for farmers worldwide, and just as true in Kenya, is to spray in the cool, calm hours of early morning or late evening, when there is only a light breeze and the sun is not harsh (as explained in this guide on spray drift from Cropaia). In the heat of the middle of the day, spray droplets shrink and evaporate before they even land on the leaf, so much of your chemical is simply lost to the air. Strong wind blows droplets off-target onto neighbouring fields, and low humidity makes this evaporation and drift far worse.
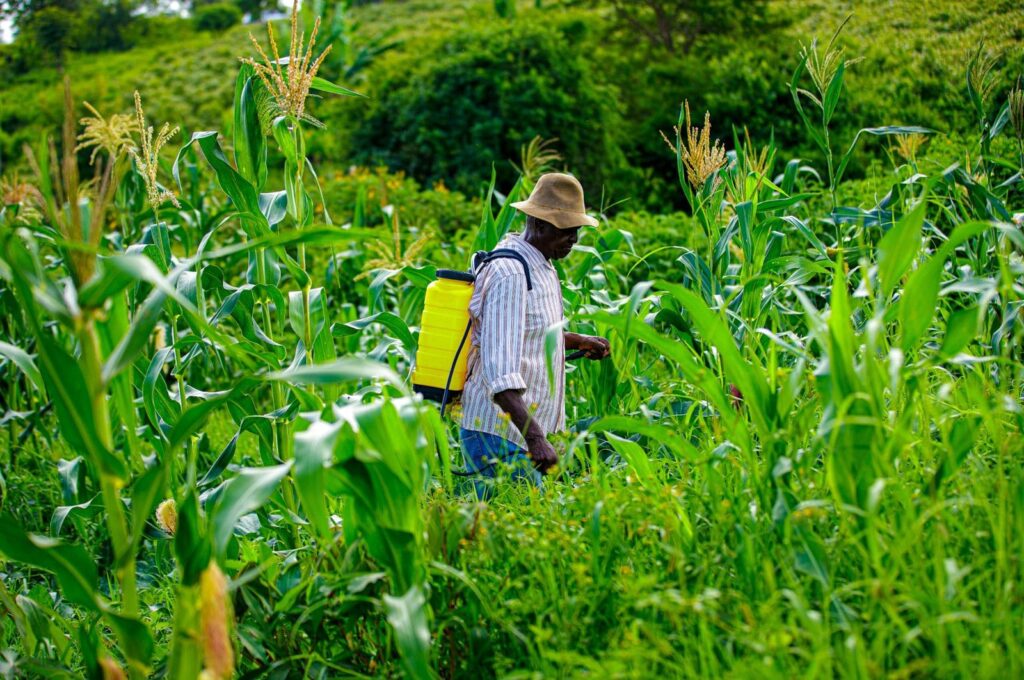
In practice this means a few clear rules. Avoid spraying in strong wind, because if leaves and branches are moving noticeably, conditions are too windy and droplets will drift away from your crop toward people, animals, and water. Avoid the hottest, driest part of the day, roughly late morning to mid-afternoon, when evaporation is highest. Never spray just before rain, which will wash your chemical, and your money, straight off the leaves and into the soil and waterways within hours, so always check the sky and the forecast first. And because bees are most active during the warm daylight hours, spraying flowering crops in the early morning or late evening also helps protect the pollinators your farm depends on.
Timing is not only about weather. It is also about the crop and pest stage. Many insect pests are far easier to control when they are young and small; once caterpillars are large or have burrowed into stalks and fruit, no spray reaches them well. Many fungal diseases, as noted earlier, must be prevented before they appear, because once established they cannot be cured. Knowing the life cycle of your particular pest or disease lets you hit it at its weakest moment instead of wasting sprays when it is least vulnerable.
How NuaSense helps
Getting the timing right by eye is genuinely hard. Conditions change hour by hour, and what looks calm at the homestead may be windy out in the field. Spray at the wrong moment and even a perfect product, correctly mixed, can mostly evaporate or drift aways before it does any good.
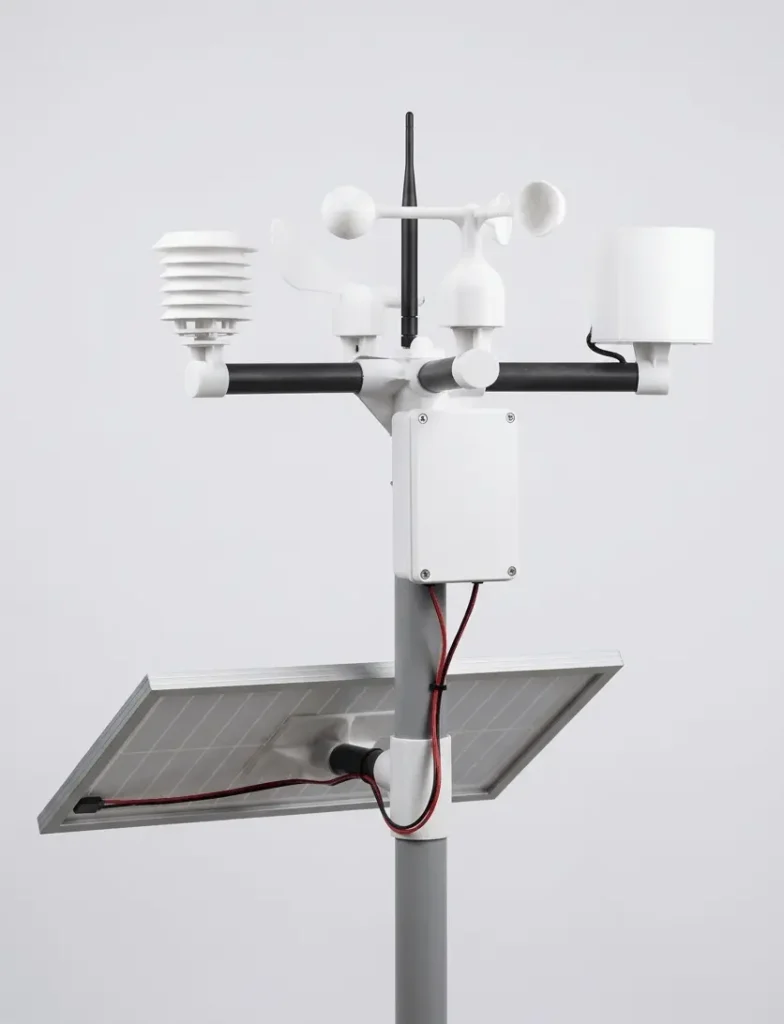
NuaSense sensors measure wind speed and direction, humidity, and temperature right there on your farm, in real time. That means you can see exactly when conditions are safe and effective for spraying, instead of guessing. You get a clear signal for the best window, so more of your chemical lands on the target, drift onto neighbours and waterways is minimised, and far less product is wasted. Better timing is one of the easiest ways to cut your spraying costs without losing any protection.
Calibrating and using your knapsack or sprayer correctly
Calibration simply means making sure your sprayer applies the right amount of chemical evenly over the right area, rather than drenching one section while barely touching another. An uncalibrated sprayer is why two farmers using the exact same product can get completely different results.
Before each big job, give your sprayer a quick check. A worn nozzle releases far more liquid than it should and sprays an uneven pattern, so inspect it and replace worn ones, since nozzles are cheap compared with the chemical they waste. Check for blockages and leaks around the lance, trigger, and hose connections, because a leaking knapsack soaks chemical into your back, a serious health risk. It is worth testing your output with clean water first, spraying a measured area to see how much you use, so you know whether your real coverage matches what the label assumes.
When applying, technique is everything. Keep a steady, even walking pace, because too fast leaves gaps where pests survive and too slow over-applies and wastes product. Hold the lance at a consistent height above the crop canopy, keep the pressure constant by pumping steadily rather than in bursts, and spray in overlapping, parallel passes so the whole field is covered without missed strips. Consistency is what turns a full tank into an even, effective treatment instead of a patchy one. A well-calibrated sprayer in steady hands can use noticeably less chemical and still give better control than a careless full-blast approach.
Getting full coverage while avoiding spray drift
Coverage and drift are two sides of the same coin. You want the spray to fully coat the target, including the undersides of leaves and into the lower canopy where so many pests and fungi actually live, while keeping it from drifting off-target onto neighbouring farms, homes, schools, livestock, water bodies, and beehives.
Good coverage means getting under the leaves, not just hitting the tops of plants. Many pests such as aphids, whiteflies, and mites, and many diseases, start on the undersides of leaves and in the dense lower canopy, so angle your lance to reach these areas. Match your droplet size to the job, too: very fine droplets give good coverage but drift easily, while coarser droplets resist drift but must be applied carefully for coverage, so for most field spraying slightly larger droplets at lower pressure are the safer choice.
Controlling drift comes down to a handful of disciplines. Spraying in calm conditions is by far the most important factor (see the timing section above). Beyond that, use larger droplets and lower pressure to keep the spray where you aim it, and always spray with the wind at your back so the chemical blows away from your body rather than into your face. Stop immediately if the wind picks up or shifts toward people, animals, water, or sensitive neighbouring crops, because a short delay is far cheaper than poisoning a neighbour’s field or your own water source, and leave an untreated buffer strip next to water bodies, homes, and beehives.
Drift wastes money and creates a real safety, neighbourly, and legal risk for everyone and everything downwind. Controlling it protects your community as well as your wallet.
After spraying: Safety, records, and smarter farming
The job is not finished when the tank is empty. What you do after spraying protects your harvest, your customers, your land, and the success of every season to come. This is the stage most farmers neglect, and it is where some of the biggest long-term gains are hiding.
Observing pre-harvest intervals and re-entry periods
Every pesticide label states a pre-harvest interval (PHI), the minimum number of days you must wait between your last spray and harvesting the crop. During this period the chemical breaks down to safe levels. The PHI varies widely from product to product, from just a day or two up to several weeks, so you must check the label of the exact product you used.
Harvesting before the PHI has passed is both dangerous and expensive. It leaves residues that can make people sick, and it is exactly what gets produce rejected by supermarkets, aggregators, and export buyers who test for chemical residues. For farmers selling into formal or export markets, a single residue failure can cost an entire consignment and damage a long-term buyer relationship. Plan your spraying around your expected harvest date, not the other way round.
There is also a re-entry period, the time that people and animals should stay out of a freshly sprayed field. Respect both intervals strictly: tell your workers and your family when a field has been sprayed, and keep children and livestock well away from treated plots until it is safe. Treat both intervals as the firm line between safe food and contaminated food, and between a safe farm and an accident.
This is also where record-keeping earns its place. Keep a simple notebook noting, for each spray, the date, the crop and field, the product used, the dose, the reason you sprayed, and the weather. A record like this helps you observe PHIs correctly, prove compliance to buyers, rotate chemical families to slow resistance, and learn what actually works on your farm over time.
Safe disposal of containers and leftover mixture
Empty pesticide containers are still dangerous, because they hold enough residue to poison a person or an animal. They must never be reused for food, water, paraffin, animal feed, or anything else. Reusing pesticide containers for drinking water or cooking is a tragically common cause of poisoning in rural areas, and it is completely avoidable.
To dispose of a container safely, triple-rinse it and pour the rinse water into your sprayer so it is used on the crop rather than wasted, then puncture or crush it so no one can reuse it, and dispose of it as the label and your local guidelines instruct, since many areas have collection points or specific advice available through agrovets and extension services. Never burn containers, because the fumes are toxic, and never dump them or leftover spray into rivers, dams, drainage channels, or your own water source. If you followed the earlier advice and only mixed what you needed, you should have little or no leftover spray; any small amount that remains should be sprayed out onto the labelled crop, rather than poured onto the ground.
Careless disposal does more than risk immediate poisoning. It slowly degrades the very foundation of your farm. Chemical residues build up in the soil and water over the years, harming the earthworms, microbes, and beneficial insects that your crops quietly depend on for healthy growth and natural pest control. If you want to understand how this plays out over time, our article on declining soil health explains why protecting your soil is one of the most profitable long-term decisions a Kenyan farmer can make.
Using sensor data to spray less and at the right time
The most successful farmers, in Kenya and around the world, are moving away from “spray on a fixed calendar” and toward “spray only when the data says it is truly needed.” This shift is the heart of Integrated Pest Management (IPM): combining good field hygiene, resistant varieties, natural enemies, and careful scouting so that chemical spraying becomes the last line of defence rather than the first reflex.
Every spray you can safely avoid is a direct gain. It saves money, protects your soil and pollinators, slows down pest resistance, and keeps residues off your food and out of your market. But to spray less without losing your crop, you need one thing above all: confidence about when a real threat is building, and when the conditions are right to act. Guesswork pushes farmers to over-spray, while good data lets them spray less, safely.
That is exactly what NuaSense was built for. Our IoT sensors track the conditions on your specific farm and turn them into clear, practical recommendations, telling you when pest and fungal risk is genuinely rising, and when the weather is right for an effective, low-drift spray. Instead of spraying out of fear or habit, you act on evidence from your own shamba.
And we do not work alone. NuaSense is part of a joint study with ProTeen and Coastal Biotech focused on increasing yields while safeguarding crops. In this partnership, NuaSense handles the data tracking, Coastal Biotech provides the biostimulant, and ProTeen provides the fertiliser, three pieces working together so that farmers get a healthier, higher-yielding crop with fewer wasted inputs. Smart spraying is just one part of a bigger picture of growing more food, more sustainably. For more practical ideas in that direction, see our guide on how to increase crop yields in Kenya.
Good spraying comes down to the right chemical, at the right dose, at exactly the right moment. Get those three right, and you protect your crop, your health, your soil, and your income all at once.
Spray smarter, not more, with NuaSense
Stop guessing when to spray. Let your farm’s own data tell you when pests and fungi are a real, building threat, and when the weather is right to act, so you protect your crop, your soil, and your income while spending less on chemicals you do not need.
Discover how NuaSense can help your farm →
In partnership with ProTeen and Coastal Biotech, working together to raise yields and safeguard Kenya’s crops.
This article is for general educational purposes. Always read and follow the product label, and consult a licensed agrovet or your county agricultural extension officer for advice specific to your crop, region, and situation.